
Modern mountain bike disc brakes are amazing, it’s gotta be said. They’re powerful, they’re quiet, they have great modulation and for the most part, they’re pretty damn trouble-free. The thing is, brakes are right up there with one of the most abused parts of your bike — they have to generate a hell of a lot of stopping power when you’re pinning it down the trail at warp speed, and there isn’t much margin for error, so it’s pretty noticeable when things aren’t right.
One of the main problems that can creep up over time is brakes that feel sticky. Maybe they’re dragging a little, maybe they’re dragging a lot and you can’t center them no matter what. Often this is the result of a sticky or lazy piston. With a lot of brakes using four pistons these days, that’s a lot of pistons to keep moving freely all the time, and if one is feeling lazy then the pads might not run parallel, making it difficult to set the brakes up properly.
This guide shows a super quick and easy way to clean and maintain your brake calipers. This maintenance should be done periodically, not just when the brakes are misbehaving. Before we get into it, however, it’s worth taking a little time to explain exactly how brakes work and what we’re doing here.
In short, what we want to do is clean up the brake pistons. Over time, dirt and grime will get onto the pistons, either from the trail or from pad dust. Additionally, oil can make its way onto your pistons, which also hampers performance. The main point I want to drive home here is that, contrary to popular belief, brake pistons should not be lubed. They should be cleaned, and here’s why.
The piston seals in your caliper have two main jobs. The first is to keep the brake fluid inside the brake, and anything that isn’t brake fluid out of the brake system. The second job is to keep the piston where it should be — far enough away from the rotor that the pads don’t rub, but close enough that it provides braking force when the lever is pulled. Popular belief is that the pistons move in and out of the seals when the lever is pulled or released, and this is why lubrication helps. However, this is not the case — since there would be no mechanical means for the piston to retract.

Pistons seals actually have a square cross-section, otherwise known as quad-rings. The seal holds onto the piston tightly, and when the lever is pulled the seal flexes allowing the piston to move outwards, and when the lever is released the seal springs back allowing the piston to retract. The only time the piston should move through the seal is when it advances to account for pad wear when the seal reaches its elastic limit before braking happens and the piston has nowhere else to go. Therefore it’s important that the quad-ring make a good seal around the piston, and that the piston is not lubricated. When the piston is lubricated, it will slip out easily and cannot retract, resulting in rubbing brakes.
So there you have it, this is why it’s a good idea to clean your brakes, and why it can make such a big difference. Let’s get into it.
Tools needed

This is a pretty simple one that doesn’t require much in the way of tools.
- Set of Allen keys
- Brake piston press (optional, use a plastic tire lever otherwise)
- Pedro’s tire lever, or a bleed block with a chunk cut out, depending on your brakes.
- Q-tips, for cleaning
- Isopropyl alcohol anywhere between 70-100% is good, or brake cleaner
- A clean-ish rag
- Pliers for removing pad retaining bolt clip or split pin
Step 1

Remove the wheel for the caliper you want to service.
Step 2
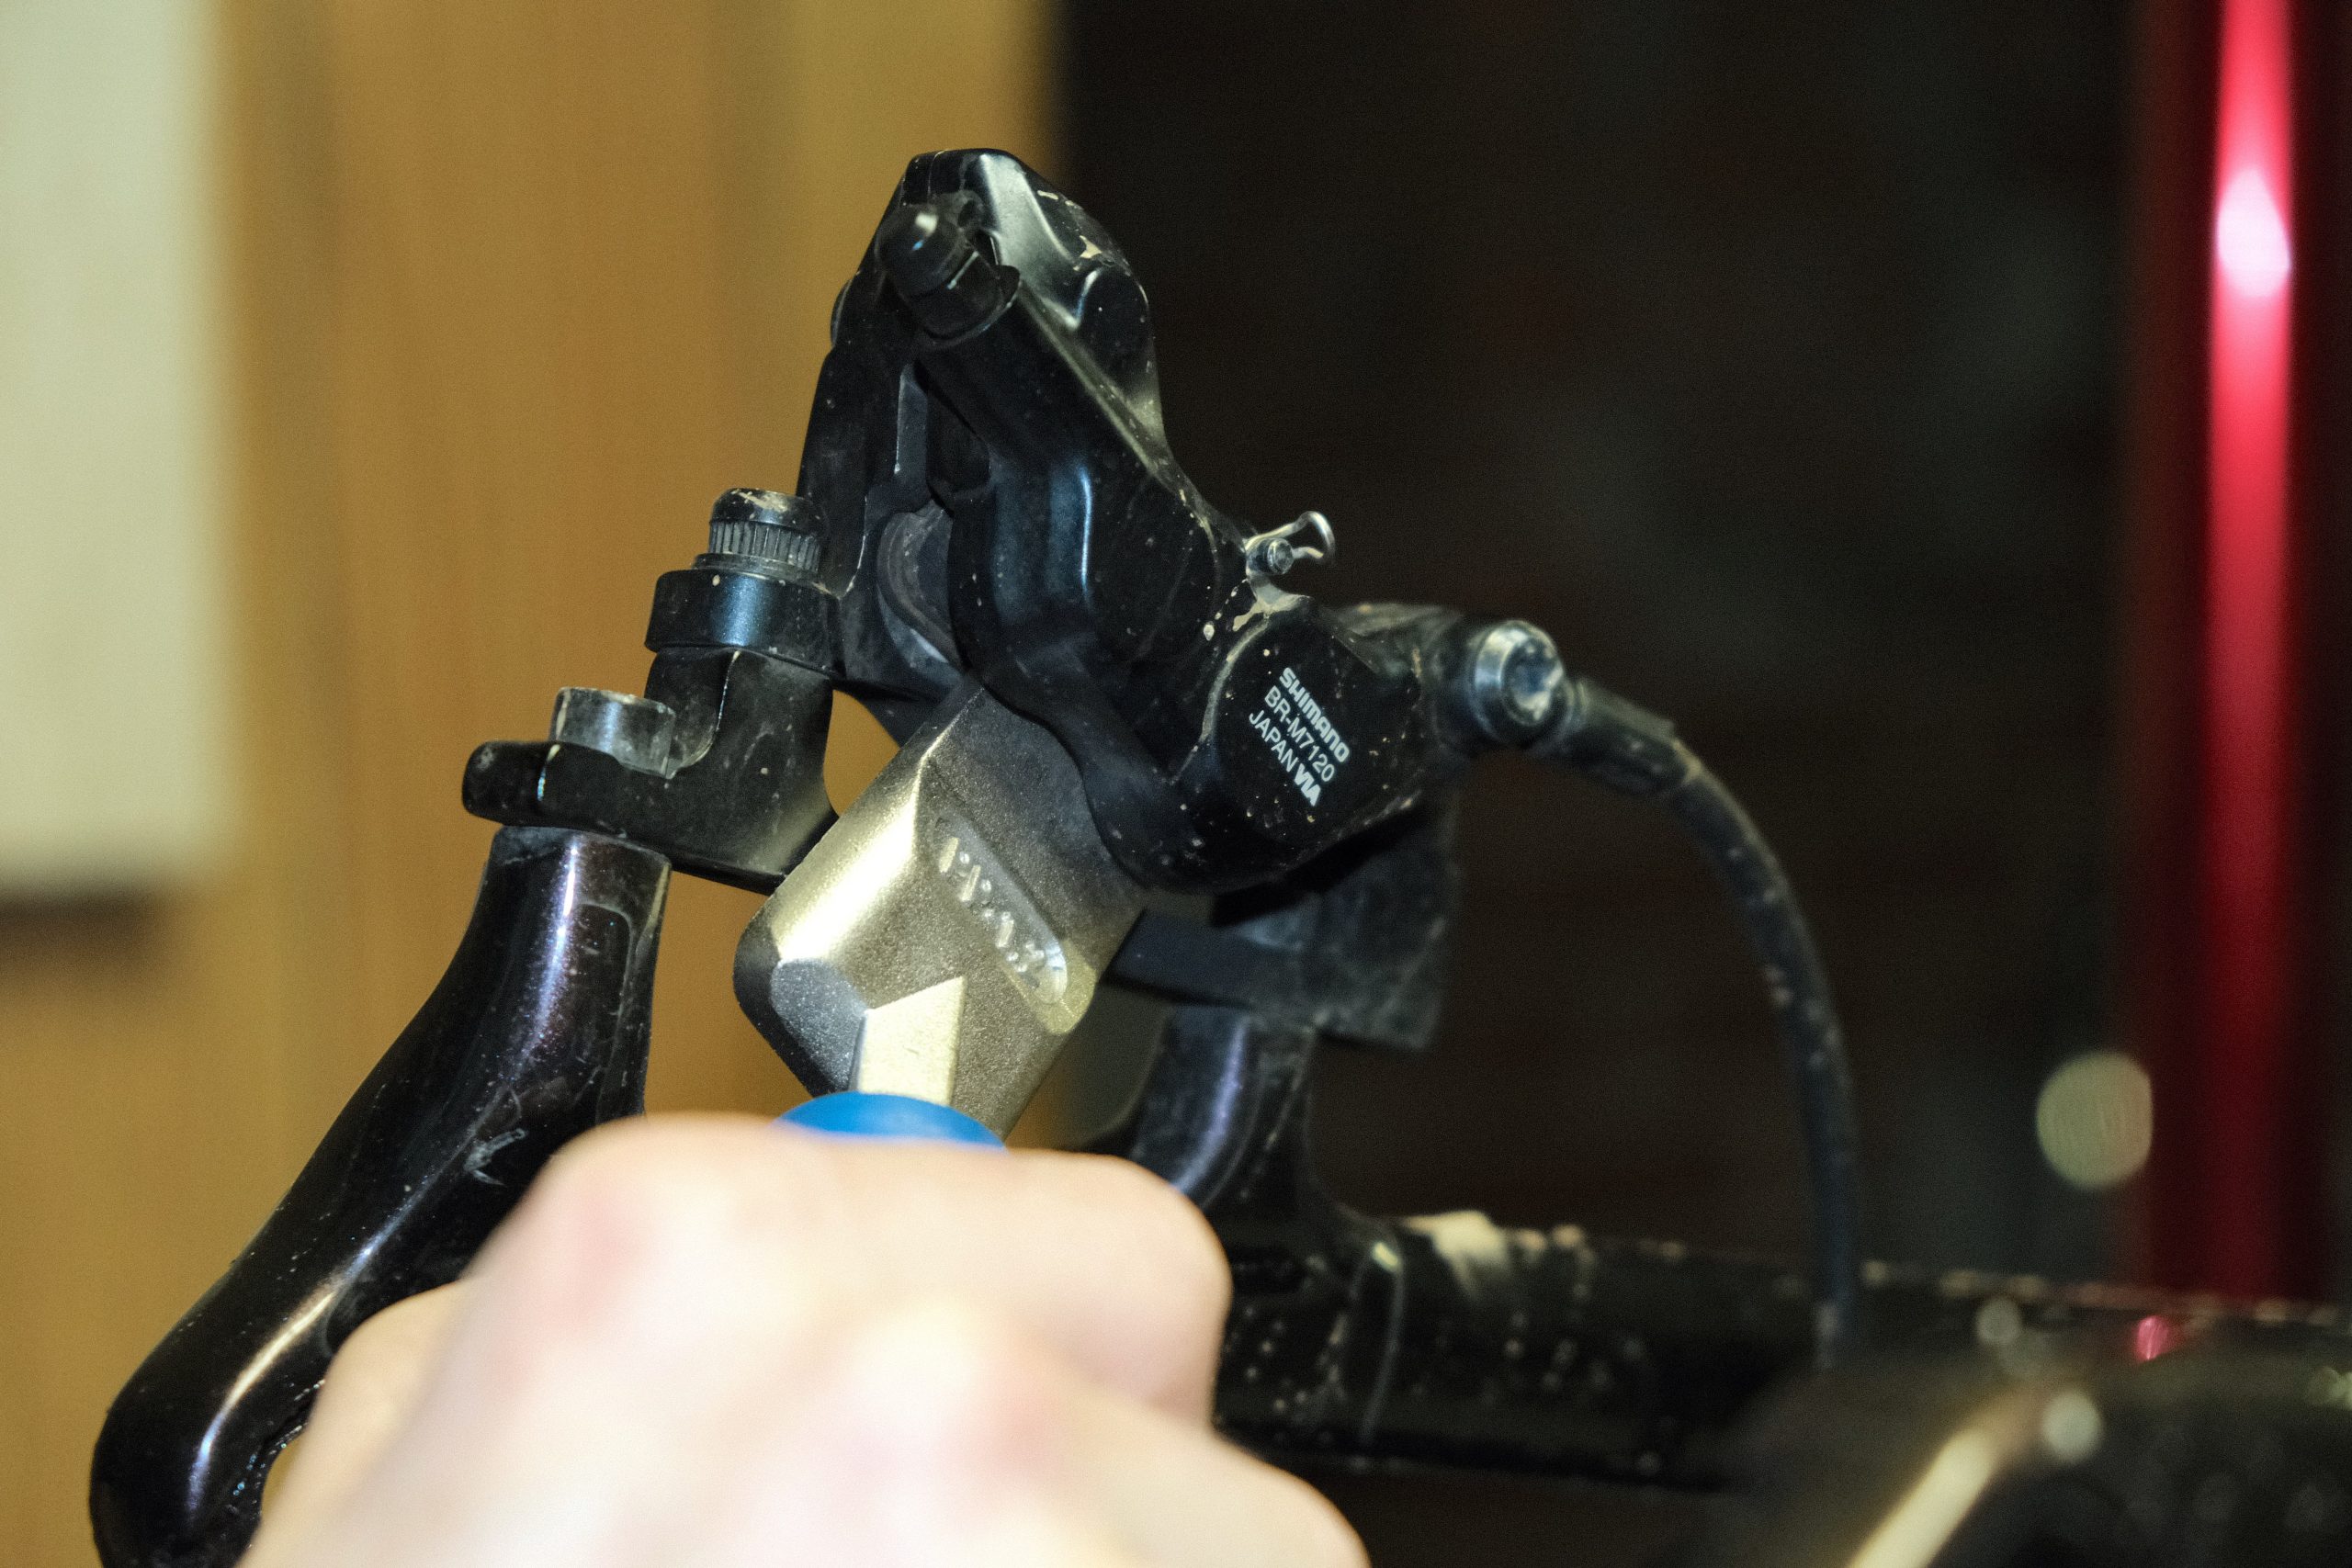
Push pistons back. It’s a good idea to leave the brake pads in here to avoid damaging the pistons, particularly if you have Shimano brakes. You may need to open the bleed port to let some fluid out if your brakes are overfilled.
Step 3


Remove pads. This is different depending on your brake but remove the pad retaining clip and bolt, or split pin, pull the pads out and set them aside some place where there’s no risk of contamination.
Step 4

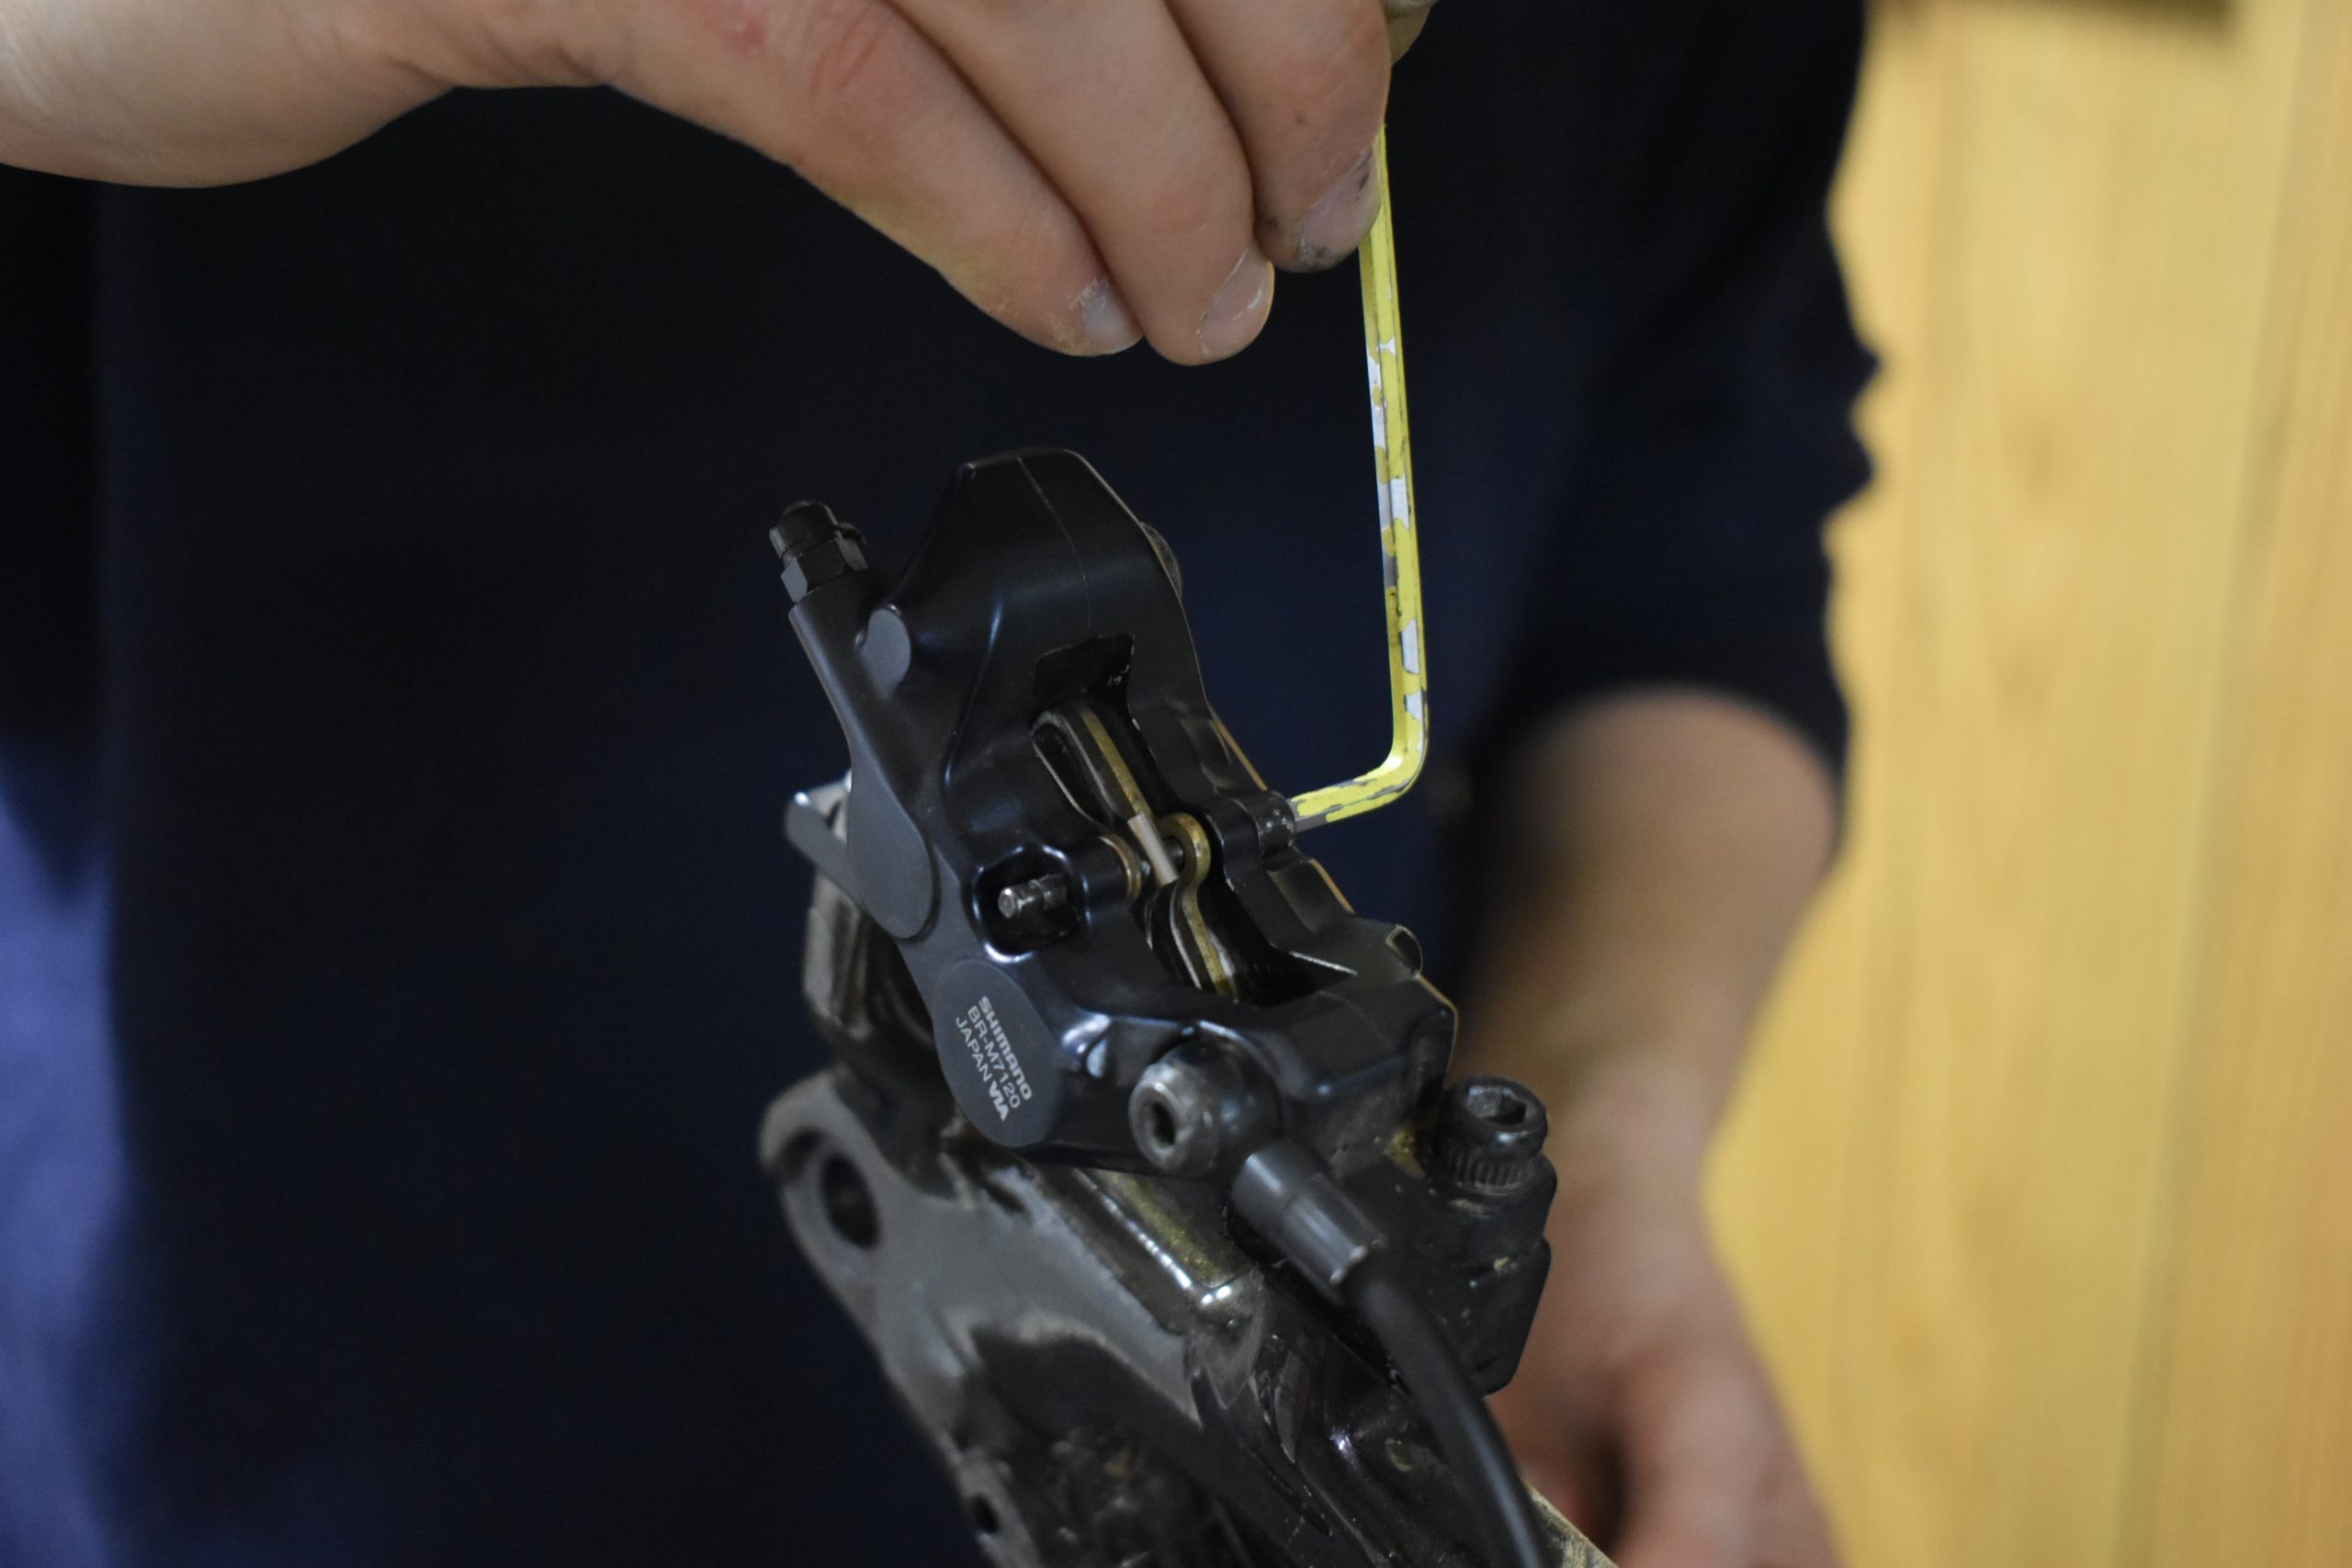
Grab your Pedro’s tire lever. These tire levers have an amazing feature where they’re fatter on one side than the other and it’s the perfect width to insert into most four-piston brake calipers. They will block three pistons from moving while allowing the fourth to pop out when the lever is pulled. This for sure works for most SRAM and Shimano four-piston brakes, however if this doesn’t work for you, you can simply grab a bleed block and cut a quarter off with a hack saw (or half if you’re running two-piston brakes). Simply insert and flip.
Step 5

Insert your Pedro’s lever or hacked bleed block so that only one piston is fully exposed and pump the lever. Be careful here. You should be able to pop the piston out 4-5mm. You’ll likely see a ring of dirt on the piston. Once the dirt is fully exposed you can safely stop. You don’t want to fully pop the piston out. Your tool should stop this from happening, but on the off chance it does fall out you’ll need to fully bleed the brake.
Step 6


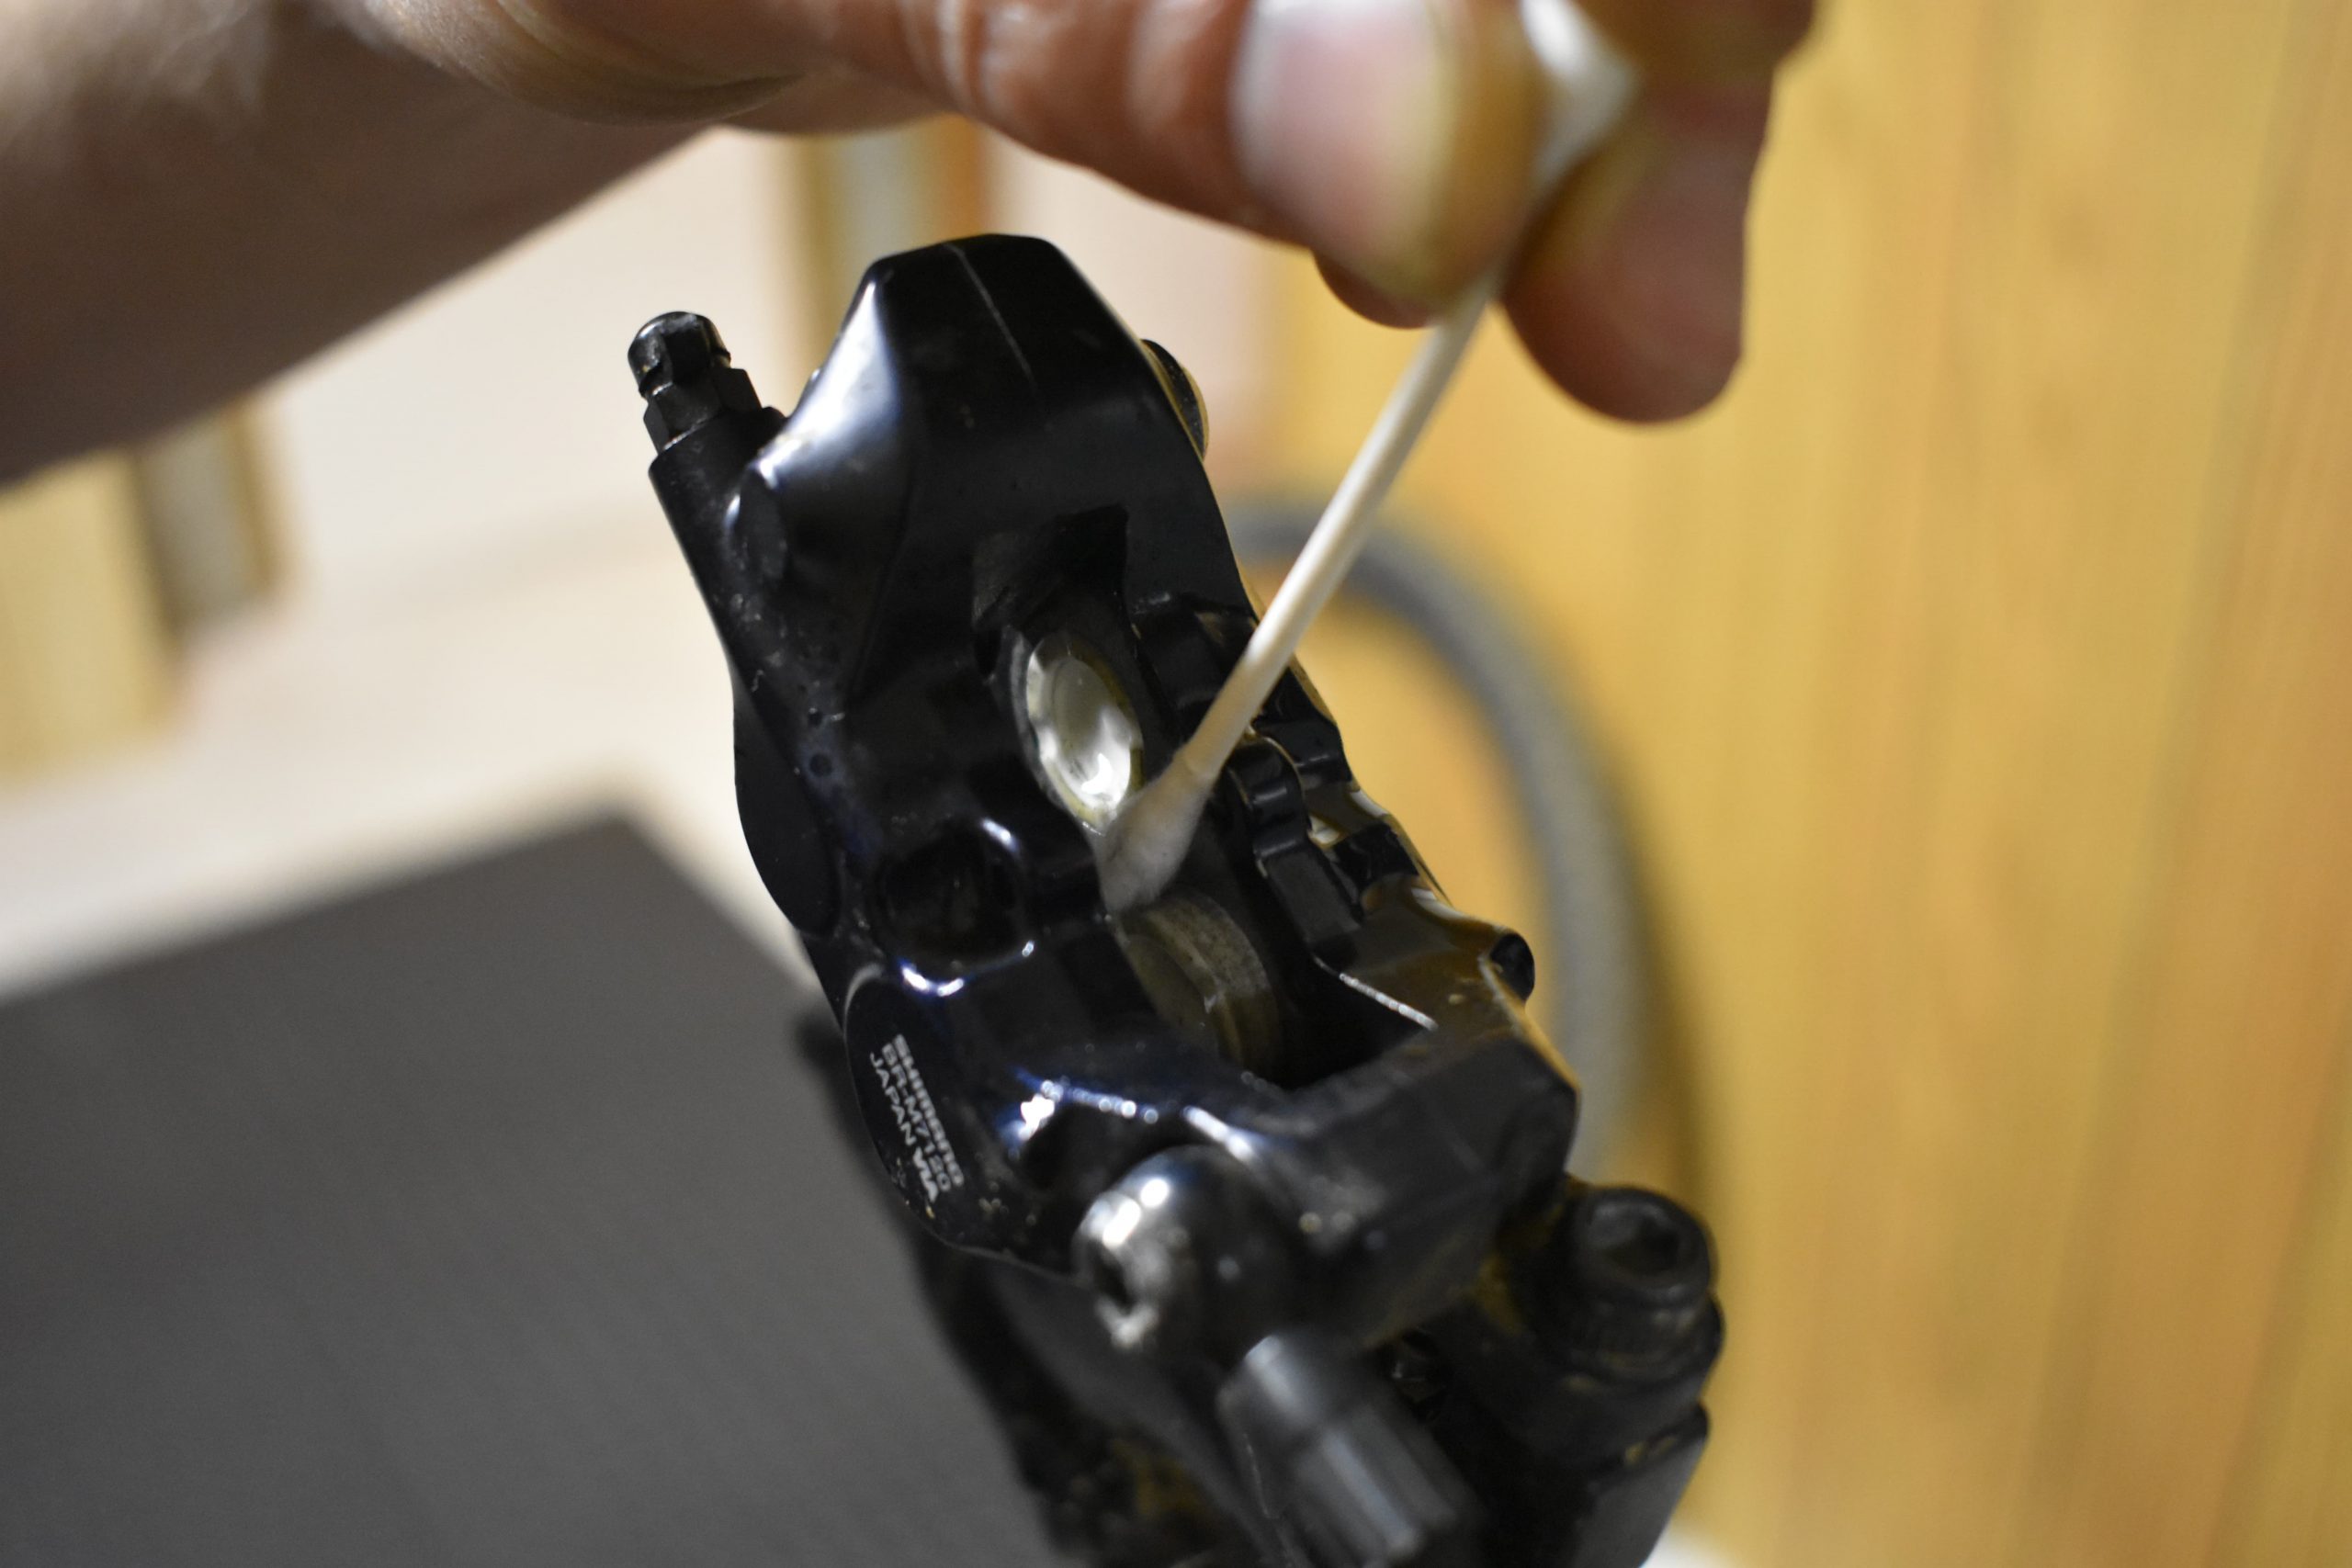
Remove your Pedro’s lever/bleed block from the caliper and douse the caliper liberally with isopropyl alcohol/brake cleaner. Grab a Q-tip and gently clean the piston all the way around. You won’t get it sparkly like when it was new, but it doesn’t need to be.
Step 7
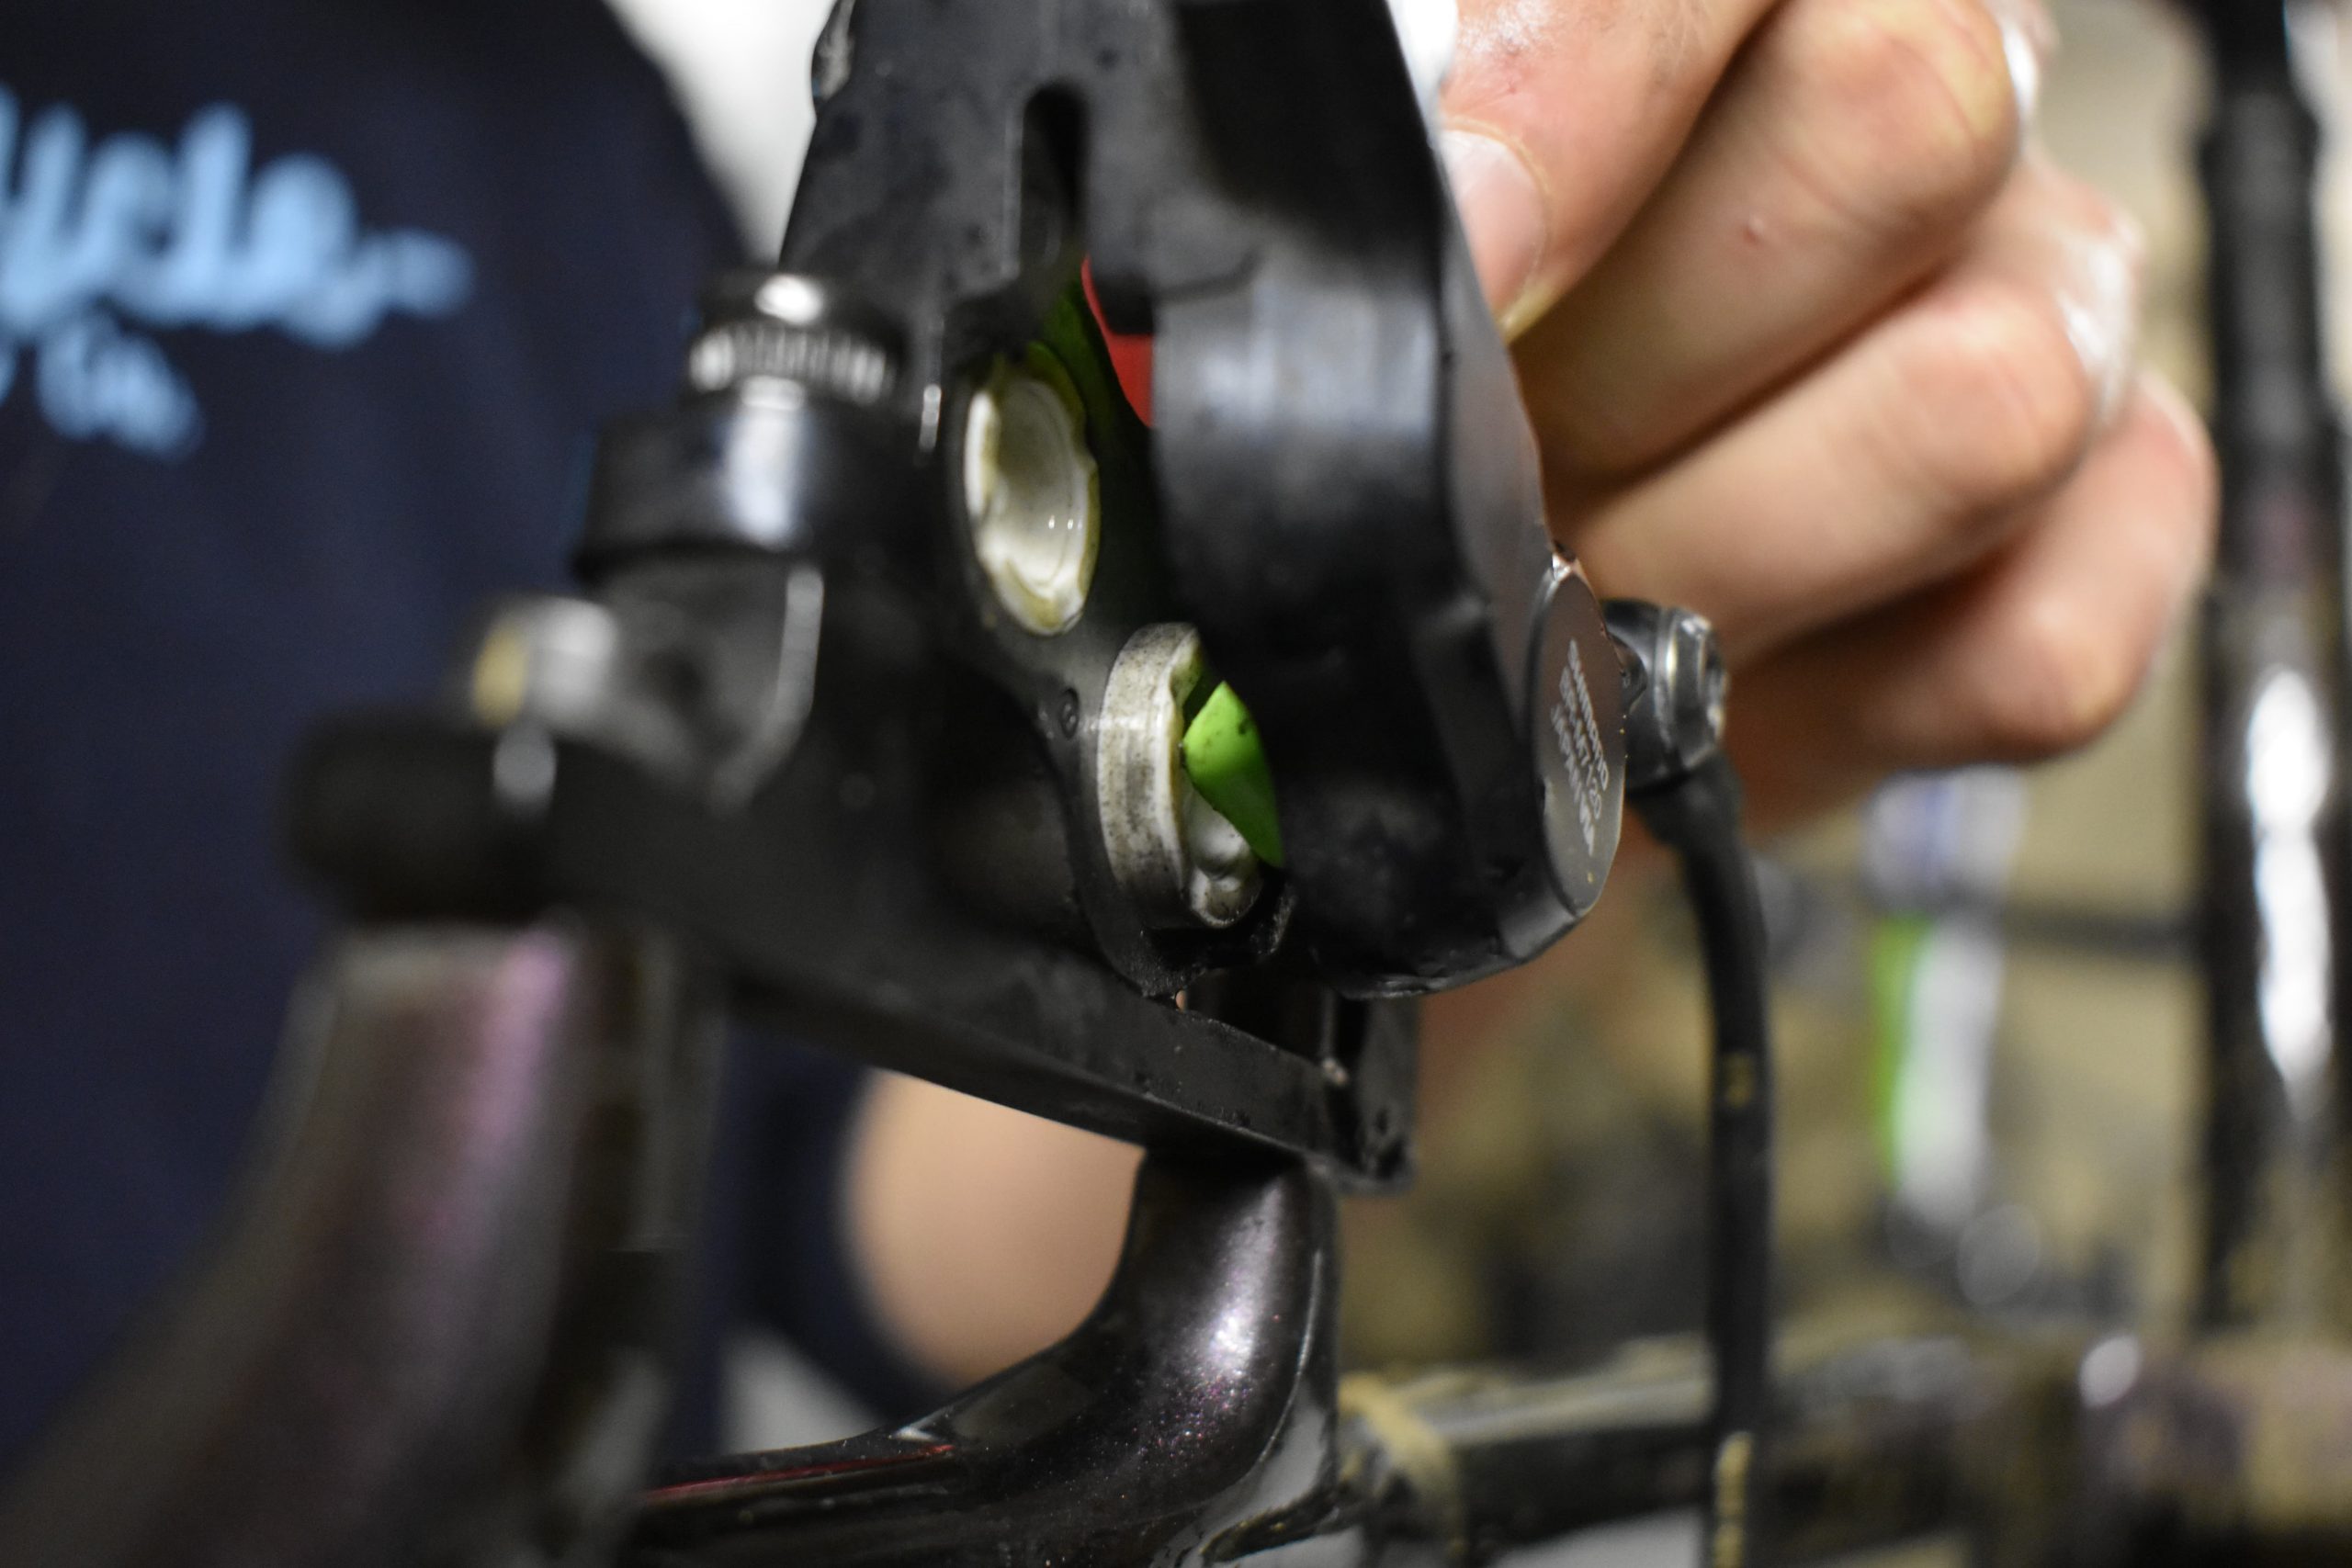
Use either your Pedro’s lever or piston press to push the piston back. I like the Pedro’s lever because it’s plastic and won’t damage the piston. Shimano pistons need extra care because they’re ceramic and can easily crack. Push the piston from its center to ensure it goes back straight rather than crooked to avoid cracking.
Step 8

Turn your tire lever/bleed block around and repeat steps 5-7 for all the other pistons in the caliper until they’re all cleaned and reset.
Step 9
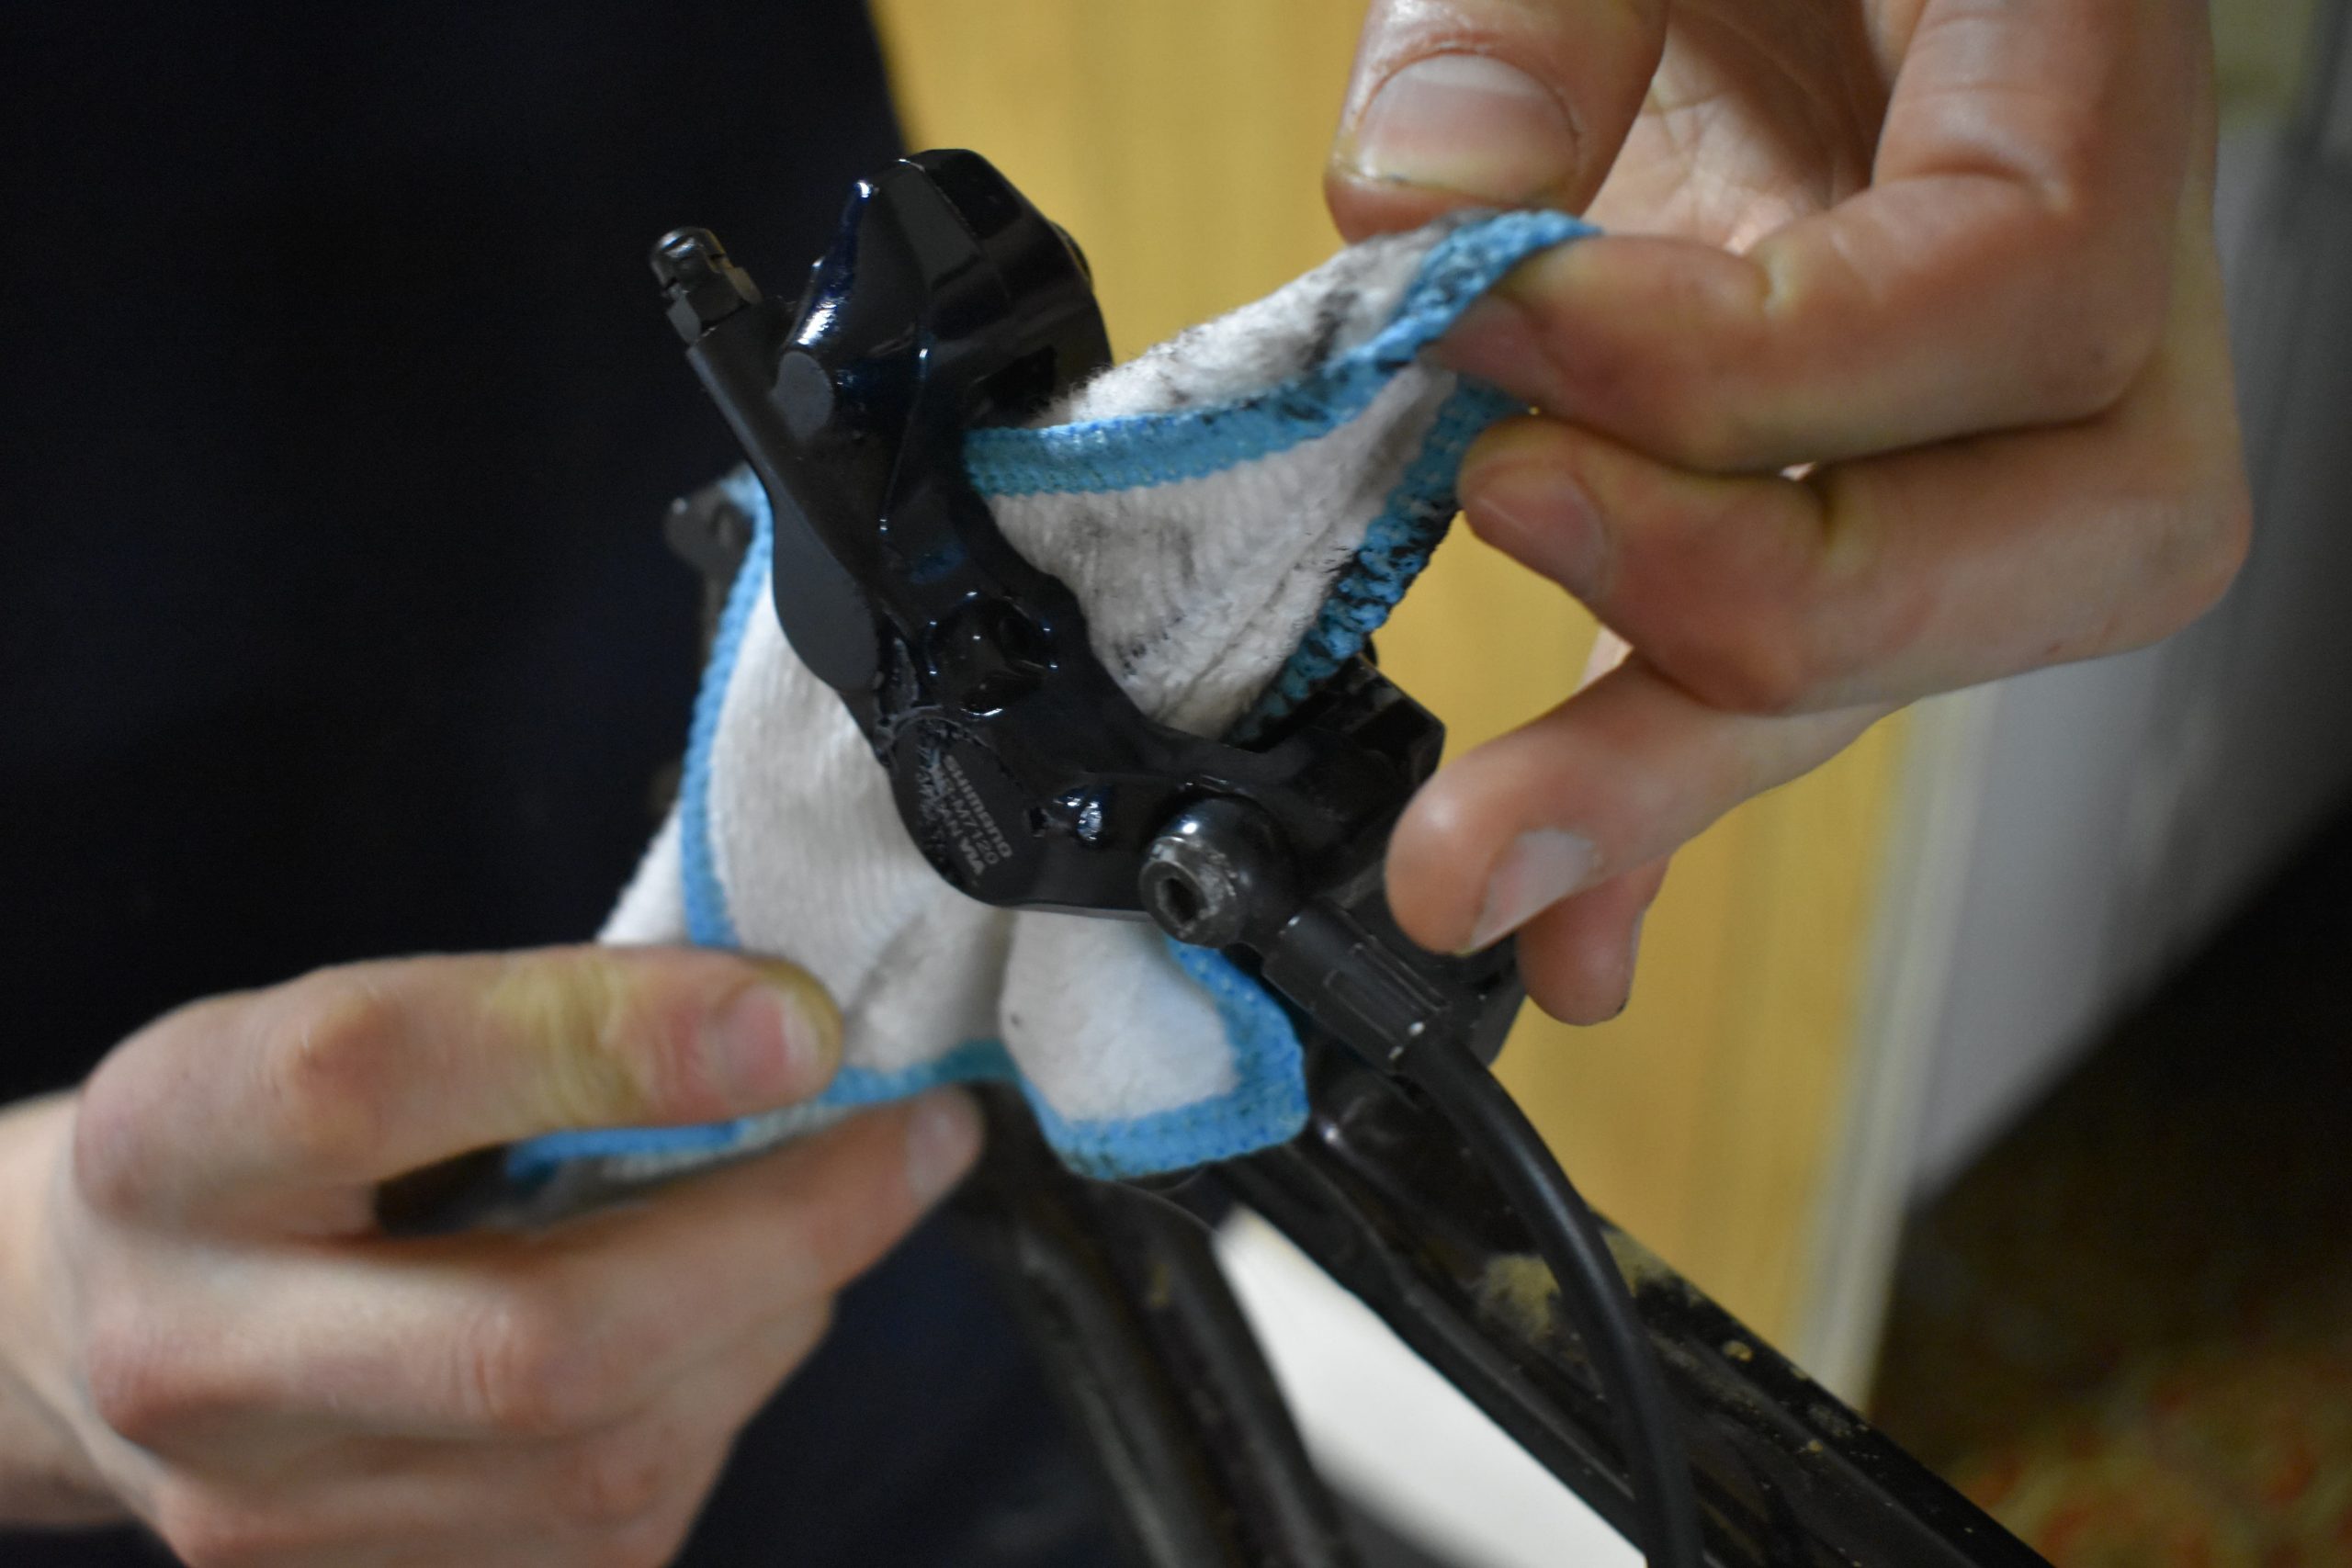
Clean the caliper up. Again spray liberally with alcohol or brake cleaner and clean the whole caliper with a clean rag to make sure there’s no dirt or oil remaining.
Step 9

Refit the brake pads and retaining pin. Loosen the caliper mounting bolts by about half a turn so that the caliper can freely move side to side on the mount and then re-fit the wheel.
Step 10

Now it’s time to center up the brake, and after cleaning the pistons this should be nice and easy. It’s important to do this with the pistons fully retracted and the caliper mounting bolts loose so that the caliper has a chance to center properly over the rotor. Pull the brake lever a few times until the brake bites properly, then hold the lever while tightening the caliper bolts. It can help to spin the wheel and use the brake to slowly bring it to a stop to center the caliper properly in case there are any wobbles in the rotor.
And we’re done! If you’re still having problems with a sticky piston, chances are there’s something more sinister going on. If you didn’t bleed your brakes already, it’s worth giving the system a full flush. If the problem persists then it may be time to fully rebuild your caliper with new seals and pistons or fit a new caliper. Other problems such as the brakes sticking on fully and not releasing — that is the lever feeling extremely firm — could indicate a master cylinder problem in the lever requiring a lever rebuild or a new lever.

Great info, in the automotive industry I’ve been told when rebuilding calipers to douse the caliper o-rings in DOT for lubrication. I applied that same logic to a 4 piston bike caliper rebuild a few years ago. Makes a lot more sense now why they dragged worse after the tune up!
At the price of high end brakes on high end bikes… Either do the routine maintenance or pay up.
My bikes are kept detailed with good reason, I want to keep the reliability top notch.
Perhaps this article will help folks discover that it is very easy to keep a bike healthy and happy.